Angled soffit installation presents a unique challenge in exterior home improvement projects. Effective soffit design ensures proper ventilation, preventing moisture build-up under the eaves. Proper tools such as a circular saw with an angled blade are essential for a precise angled soffit installation. This DIY guide is specifically designed to equip homeowners with the necessary knowledge and steps for achieving professional results in their angled soffit installation projects.
Optimizing Your "Angled Soffit Install: DIY Guide for Perfect Results" Article Layout
This guide outlines the optimal structure and content for an article focusing on DIY angled soffit installation. We’ll break down the key sections and elements that contribute to a clear, informative, and helpful resource for readers tackling this project. The primary goal is to provide a step-by-step walkthrough with actionable advice, ensuring readers achieve professional-looking results.
1. Introduction: Setting the Stage for Angled Soffit Installation
- Hook and Problem Statement: Start by grabbing the reader’s attention. Highlight the benefits of a well-installed angled soffit (e.g., improved ventilation, enhanced aesthetics, protection from the elements). Briefly mention the common problems homeowners face when attempting this DIY project, such as incorrect angle measurements, improper cutting, or using the wrong materials.
- Brief Definition: Clearly define what an angled soffit is and explain its purpose. This helps readers who may not be completely familiar with the terminology. Mention the difference between angled soffits and standard (flat) soffits.
- Article Overview: Outline what the reader will learn in the article. This should include a clear statement that the article will guide them through each step of the angled soffit installation process, covering everything from planning and material selection to cutting, installation, and finishing.
2. Preparation is Key: Planning and Gathering Supplies
- Safety First: Begin with a prominent safety disclaimer. Emphasize the importance of wearing appropriate safety gear, such as eye protection, gloves, and a dust mask. Remind readers to work on stable platforms and be mindful of overhead power lines.
- Measuring and Planning:
- Explain how to accurately measure the area where the angled soffit will be installed. Include diagrams or illustrations to visually demonstrate the process.
- Discuss calculating the correct angle for the soffit cuts. Offer different methods, such as using a protractor, angle finder, or online angle calculators.
- Emphasize the importance of double-checking measurements to minimize errors and material waste.
- Material Selection:
- Provide a comprehensive list of necessary materials, including:
- Soffit panels (mention different materials like vinyl, aluminum, wood)
- Fascia board (if necessary)
- Nails, screws, or staples (specify the appropriate type for the material being used)
- Venting material (e.g., continuous soffit vents, individual vent covers)
- Caulk (exterior grade)
- Briefly discuss the pros and cons of different soffit materials, helping readers make informed choices based on their budget, climate, and aesthetic preferences.
- Provide a comprehensive list of necessary materials, including:
- Tools Needed:
- Create a detailed list of required tools, including:
- Measuring tape
- Pencil
- Saw (circular saw, miter saw, or hand saw)
- Level
- Square
- Hammer or nail gun/staple gun
- Caulking gun
- Safety glasses
- Gloves
- Ladder or scaffolding
- Create a detailed list of required tools, including:
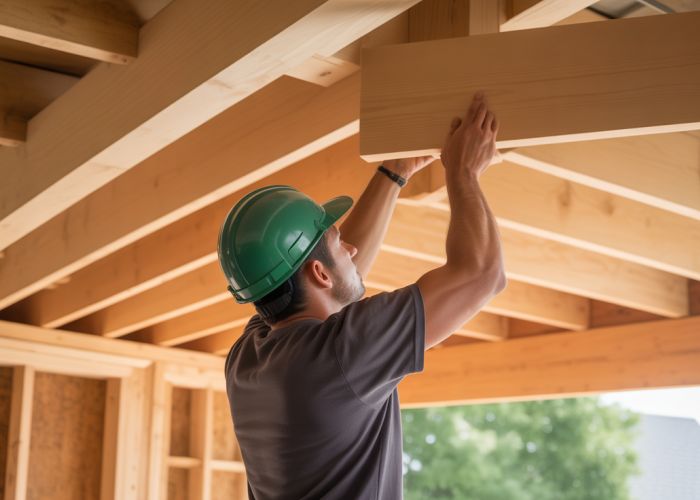
3. Step-by-Step Angled Soffit Installation
- Step 1: Preparing the Surface:
- Explain how to clean and prepare the area where the soffit will be installed. This may involve removing old soffit, repairing damaged fascia board, or ensuring the surface is level and free of debris.
- If necessary, explain how to install or repair the fascia board as a base for the soffit.
- Step 2: Cutting the Soffit Panels:
- Provide detailed instructions on how to cut the soffit panels at the correct angle.
- Include clear diagrams or photographs illustrating the cutting process.
- Offer tips for making clean, accurate cuts.
- Explain how to account for any necessary overlaps or seams.
- Emphasize the importance of using the correct blade for the chosen soffit material.
- Step 3: Installing the Soffit Panels:
- Explain how to securely attach the soffit panels to the structure using nails, screws, or staples.
- Describe the correct spacing for fasteners to ensure a strong and durable installation.
- Provide guidance on aligning the panels properly and maintaining consistent gaps.
- Address any specific considerations for installing soffit panels with integrated vents.
- Step 4: Adding Ventilation (if required):
- If the soffit panels don’t have integrated vents, explain how to install separate vent covers or continuous soffit vents.
- Provide guidance on calculating the appropriate amount of ventilation needed based on the attic size and climate.
- Step 5: Finishing Touches:
- Explain how to caulk any gaps or seams to prevent water damage and improve the overall appearance.
- Provide tips for achieving a professional-looking finish.
- Suggest painting or staining the soffit (if applicable) to match the existing trim.
4. Troubleshooting Common Issues
- List of Common Problems: Identify common problems encountered during angled soffit installation and provide solutions. Examples:
- Incorrect angle measurements
- Gaps or uneven seams
- Loose or sagging soffit panels
- Water leaks
- Q&A Format: Present solutions in a question-and-answer format. For instance:
- Q: "My angle measurements were off. How can I correct this?"
- A: "Re-measure carefully using a protractor or angle finder. You may need to cut new panels or adjust the existing ones…"
5. Maintenance and Longevity
- Regular Inspections: Advise readers on how to regularly inspect their angled soffits for signs of damage or deterioration.
- Cleaning Tips: Provide tips for cleaning the soffit panels to maintain their appearance.
- Preventative Measures: Suggest measures to prevent common problems, such as sealing gaps, repairing damaged areas promptly, and ensuring proper ventilation.
This structure provides a comprehensive guide to angled soffit installation, focusing on clarity, accuracy, and practical advice for DIYers. The step-by-step instructions, troubleshooting tips, and maintenance advice will empower readers to achieve successful and long-lasting results.
Angled Soffit Installation: FAQs
This section answers common questions about installing angled soffits, helping you achieve a professional finish on your DIY project.
What tools are essential for angled soffit installation?
Beyond standard tools like a saw, drill, and measuring tape, a speed square is crucial for accurate angle cuts. A laser level can also be helpful for ensuring consistent alignment, particularly over longer runs. Consider personal protective equipment like safety glasses and gloves.
How do I accurately measure the angles for my soffit cuts?
Use a protractor or angle finder to determine the precise angle where the soffit meets the wall. Transfer this angle to your soffit material for cutting. Remember to account for any overhang or variations in your roofline during measurement.
What type of material is best for angled soffits?
While wood is a common choice, vinyl or aluminum soffits are more resistant to moisture and rot. Choose a material that complements your existing siding and provides adequate ventilation for your attic space. Consider the long-term maintenance required for each option.
How do I ensure proper ventilation with angled soffits?
Proper ventilation is essential. Ensure your angled soffit installation incorporates vents to allow airflow into the attic. These vents can be individual units or continuous strips integrated into the soffit panels. The correct number and size of vents are crucial to prevent moisture buildup.
Alright, that wraps up our DIY guide for angled soffit installation! Hope you found it helpful and are feeling confident tackling your project. Now go get those perfect results!