Airless sprayer performance directly affects project outcomes, particularly for professionals relying on Graco equipment; reduced output often signals a need for airless spraying maintenance. Proper nozzle selection is essential for achieving optimal spray patterns, but clogs and wear can quickly lead to equipment failure. Wagner sprayers, like all airless systems, benefit significantly from routine care, including cleaning and inspection of components like the pump, ensuring consistent and reliable operation. Addressing these factors proactively is key to preventing frustrating downtime and ensuring consistent results when airless spraying.
Crafting the Ideal Article Layout: "Airless Sprayer Dying? Maintenance Tips & Tricks Revealed!"
This outline details how to structure an article focused on "airless spraying maintenance" for an informative and instructional user experience. The goal is to provide clear, actionable advice that addresses common problems and preventative care.
1. Introduction: Identifying the Problem and Setting the Stage
- Hook: Begin with a relatable scenario. For example, "Is your airless sprayer sputtering, losing pressure, or just plain not spraying? Don’t throw it out just yet!" This immediately grabs the reader’s attention by addressing a common frustration.
- Overview: Briefly explain what airless sprayers are used for and why proper maintenance is crucial for their lifespan and performance.
- Thesis Statement: Clearly state that the article will provide troubleshooting tips and maintenance strategies to revive and extend the life of an airless sprayer. Example: "This article will guide you through common issues, offer step-by-step maintenance advice, and reveal tricks to keep your airless sprayer performing like new."
- Keyword Introduction: Naturally weave "airless spraying maintenance" into the introductory paragraphs. Example: "Proper airless spraying maintenance isn’t just about fixing problems; it’s about preventing them in the first place."
2. Diagnosing the Problem: Common Issues and Symptoms
- Purpose: This section focuses on helping the reader identify the specific issue they’re facing.
2.1 Loss of Pressure
- Explanation: Describe the symptom – the sprayer isn’t producing a consistent spray pattern or pressure is fluctuating.
- Possible Causes:
- Clogged tip
- Dirty filters (intake, manifold, gun)
- Worn packings
- Leaking hoses or connections
- Inadequate pump pressure
2.2 Sputtering or Uneven Spray
- Explanation: Describe the symptom – the spray comes out in bursts or the coating is uneven.
- Possible Causes:
- Air in the system
- Clogged tip
- Incorrect spray tip size for the material
- Thinning the paint too much or not enough
2.3 Sprayer Won’t Start or Turns Off Immediately
- Explanation: Describe the symptom – the sprayer either doesn’t turn on at all or shuts down shortly after starting.
- Possible Causes:
- Electrical problems (power cord, switch, motor)
- Pump is seized
- Pressure control issues
- Overload protection triggered
2.4 Leaks
- Explanation: Describe the symptom – paint or fluid leaking from different points on the sprayer.
- Possible Causes:
- Loose fittings
- Damaged seals or o-rings
- Cracked components
3. Essential Airless Spraying Maintenance Procedures
- Purpose: Provide actionable steps to maintain the sprayer and prevent future problems. Emphasize the importance of regular cleaning.
3.1 Cleaning the Sprayer After Each Use
- Step-by-Step Instructions:
- Relieve pressure and turn off the sprayer.
- Remove the spray tip and guard.
- Flush the sprayer with the appropriate cleaning solvent (water for water-based paints, mineral spirits for oil-based paints). Provide specific solvent recommendations based on paint type.
- Clean the filters (intake, manifold, gun).
- Wipe down the exterior of the sprayer.
-
Table: A table summarizing the appropriate cleaning solvent for different paint types would be useful.
Paint Type Cleaning Solvent Water-Based Latex Water Oil-Based Enamel Mineral Spirits Lacquer Lacquer Thinner
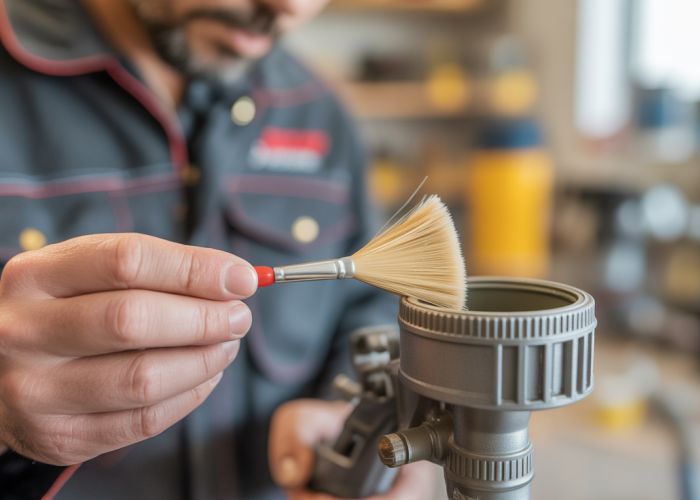
3.2 Cleaning the Spray Tip
- Importance: Explain why cleaning the spray tip is crucial for proper spray pattern and preventing clogging.
- Methods:
- Unclogging with the tip’s reverse function (if available).
- Soaking in solvent.
- Using a tip cleaning needle.
3.3 Filter Maintenance
- Frequency: How often to clean or replace filters (intake, manifold, gun).
- Procedure: Detailed steps on how to remove, clean, and reinstall the filters. Include visual aids (if possible).
- Replacement: When to replace filters, and how to choose the correct replacement filters.
3.4 Inspecting and Maintaining Hoses and Connections
- Frequency: How often to inspect.
- Procedure: Check for leaks, cracks, and wear. Tighten connections. Replace damaged hoses.
3.5 Packings and Seals Maintenance
- Explanation: Briefly describe what packings and seals are and their function.
- Lubrication: What kind of lubricant to use and how often to apply it.
- Replacement: When to replace packings and seals, emphasizing the importance of using the correct replacements. Cautionary notes about disassembling the pump without proper knowledge.
4. Advanced Troubleshooting and Repairs
-
Purpose: Offer guidance on more complex issues that may require specialized tools or knowledge. Emphasis on safety.
4.1 Pump Repair
-
Warning: Highlight the complexity of pump repair and the potential for injury if not done correctly. Recommendation to consult a qualified technician.
-
Potential Issues: Briefly mention common pump problems (worn pistons, damaged cylinders) but avoid detailed repair instructions that could be dangerous.
4.2 Motor Issues
- Warning: Highlight the potential dangers of working with electrical components. Recommendation to consult a qualified electrician or repair technician.
- Potential Issues: Briefly mention common motor problems (worn brushes, faulty windings) but avoid providing detailed repair instructions.
5. Preventative Maintenance for Long-Term Performance
- Purpose: Emphasize the importance of proactive measures to extend the sprayer’s life.
5.1 Proper Storage
- Cleaning: Ensure the sprayer is thoroughly cleaned before storage.
- Protection: Store in a dry, climate-controlled environment to prevent corrosion and damage.
- Anti-Freeze: Use appropriate anti-freeze solutions for long term storage in cold climates.
5.2 Regular Inspections
- Frequency: How often to perform a thorough inspection of all components.
- Checklist: A simple checklist of items to inspect (hoses, connections, filters, packings, seals).
5.3 Material Compatibility
- Explanation: Explain the importance of using materials that are compatible with the sprayer’s components to prevent damage.
- Recommendation: Refer to the manufacturer’s specifications for compatible materials.
5.4 Record Keeping
- Logbook: Recommend keeping a logbook of maintenance activities, repairs, and materials used.
Airless Sprayer Dying? FAQs
These frequently asked questions will help you further understand how to maintain your airless sprayer and prevent it from dying.
How often should I clean my airless sprayer?
Clean your airless sprayer after every use, without exception. This prevents paint buildup which can clog the system and lead to premature failure. Consistent airless spraying maintenance is crucial.
What’s the most common reason for an airless sprayer to fail?
The most common reason is inadequate cleaning. Paint dries inside the sprayer, blocking passages and damaging seals and pumps. Regular airless spraying maintenance prevents this.
Can I use any type of solvent to clean my airless sprayer?
No. Always use the solvent recommended by the sprayer manufacturer, typically water for latex paints and mineral spirits for oil-based paints. Using the wrong solvent can damage the sprayer components. Proper airless spraying maintenance includes using the correct solvents.
How do I prevent my airless sprayer from freezing in cold weather?
Never store an airless sprayer with water inside during freezing temperatures. The water can expand and crack the pump. Always flush with RV antifreeze for proper airless spraying maintenance in cold climates.
So, there you have it! Armed with these tips, you can hopefully breathe some new life into your trusty sprayer and get back to creating. Remember, a little airless spraying maintenance goes a long way!