Home maintenance often involves tasks like adjusting sliding doors, and neglecting these simple fixes can lead to more complex problems. Many homeowners use WD-40 to initially address sticking, but true resolution requires understanding the underlying mechanisms. Proper adjusting sliding doors ensures smooth operation and prevents damage to the door frame itself, thus saving time and resources in the long run.
Adjusting Sliding Doors: Stop Annoying Door Issues!
Sliding doors are a fantastic addition to any home, offering easy access to patios, decks, and more. However, they can become a source of frustration when they start sticking, squeaking, or generally malfunctioning. The good news is that many of these issues can be resolved by learning how to properly perform adjusting sliding doors. This guide will walk you through the process, step-by-step.
Identifying the Problem: What’s Wrong With Your Sliding Door?
Before you start wrenching away, it’s crucial to pinpoint the exact issue. This will help you focus your efforts and avoid unnecessary adjustments.
- Sticking or Difficulty Sliding: Is the door hard to open or close? Does it require excessive force?
- Uneven Sliding: Does the door slide smoothly in some areas but get stuck or bumpy in others?
- Squeaking or Grinding Noises: Are you hearing unpleasant sounds when the door is in motion?
- Door Not Latching Properly: Is the door failing to latch securely when closed?
- Drafts or Gaps: Can you feel air leaking around the edges of the closed door?
Gathering Your Tools and Materials
Having the right tools on hand will make the process of adjusting sliding doors much easier and more efficient. Here’s a basic toolkit you’ll likely need:
- Screwdrivers: Both Phillips head and flathead screwdrivers of various sizes.
- Adjustable Wrench: For loosening and tightening nuts and bolts.
- Putty Knife or Scraper: For removing debris from the track.
- Vacuum Cleaner with Brush Attachment: For cleaning the track.
- Lubricant (Silicone-based): Crucial for smooth operation. Avoid oil-based lubricants, as they can attract dirt.
- Safety Glasses: Protect your eyes from dust and debris.
- Gloves: To keep your hands clean and protected.
- Level: To check the door’s alignment.
- Measuring Tape: For accurate measurements when adjusting.
Cleaning the Track: The First Step to Smooth Sliding
Often, simply cleaning the track is all that’s needed to improve the performance of your sliding door. Debris buildup is a common culprit behind sticking and uneven sliding.
- Remove Debris: Use a putty knife or scraper to carefully remove any visible dirt, pebbles, leaves, or other debris from the track.
- Vacuum the Track: Use a vacuum cleaner with a brush attachment to thoroughly clean the entire track, including corners and crevices.
- Wipe Down the Track: Use a damp cloth to wipe down the track and remove any remaining residue.
Adjusting the Rollers: Getting the Door Back on Track
The rollers are essential for the smooth operation of your sliding door. Over time, they can become misaligned or damaged, leading to problems.
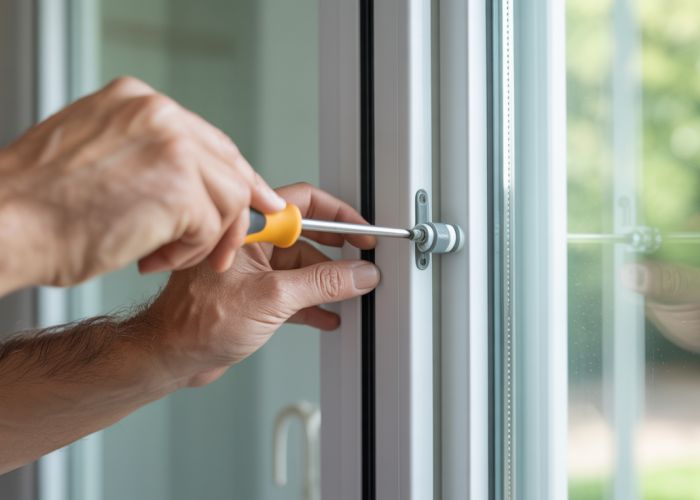
Locating the Adjustment Screws
Most sliding doors have adjustment screws located near the bottom rollers. These screws allow you to raise or lower the rollers, thereby adjusting the door’s alignment. They are typically found on the inner or outer face of the door, often covered by small plastic caps.
Adjusting the Roller Height
- Remove the Protective Caps (if any): Carefully pry off the plastic caps covering the adjustment screws.
- Use a Screwdriver to Adjust: Insert a screwdriver into the adjustment screw. Turning the screw clockwise will typically raise the roller, while turning it counterclockwise will lower it.
- Make Small Adjustments: Adjust one roller at a time, making small adjustments and testing the door’s movement after each adjustment. Avoid over-adjusting, as this can worsen the problem.
- Check Alignment with a Level: Use a level to ensure the door is hanging straight. Adjust the rollers until the door is level and slides smoothly.
- Test the Latch: After adjusting the rollers, check if the door latches properly. If it doesn’t, you may need to adjust the latch mechanism as well (see below).
- Replace the Protective Caps: Once you’re satisfied with the adjustments, replace the protective caps over the adjustment screws.
Dealing with Damaged Rollers
If your rollers are visibly damaged (cracked, chipped, or worn), they will need to be replaced. This is usually a straightforward process.
- Identify the Roller Type: Determine the type of rollers used in your sliding door. Take one roller with you to the hardware store for matching.
- Remove the Old Rollers: Typically, you’ll need to loosen a screw or bolt to remove the old roller assembly.
- Install the New Rollers: Install the new roller assembly in the same way, tightening the screw or bolt securely.
- Adjust the New Rollers: Follow the adjustment steps outlined above to fine-tune the door’s alignment.
Adjusting the Latch: Ensuring a Secure Closure
If your sliding door isn’t latching properly, you may need to adjust the latch mechanism.
Checking the Latch Alignment
Ensure the latch on the door aligns correctly with the strike plate on the frame. If they are misaligned, the door won’t latch securely.
Adjusting the Strike Plate
The strike plate is the metal plate on the door frame where the latch engages.
- Loosen the Strike Plate Screws: Slightly loosen the screws holding the strike plate in place.
- Adjust the Strike Plate Position: Move the strike plate up, down, left, or right until it aligns perfectly with the latch.
- Tighten the Screws: Once the alignment is correct, tighten the screws securely.
- Test the Latch: Close the door and test the latch to ensure it engages properly.
Lubricating the Track and Rollers: The Final Touch
Lubrication is key to maintaining smooth sliding action and preventing future problems.
- Use a Silicone-Based Lubricant: Apply a silicone-based lubricant to the track and rollers. Avoid oil-based lubricants, as they can attract dirt and grime.
- Apply Sparingly: A little lubricant goes a long way. Apply a thin, even coat.
- Work the Door Back and Forth: Slide the door back and forth several times to distribute the lubricant evenly.
- Wipe Away Excess Lubricant: Use a clean cloth to wipe away any excess lubricant.
Addressing Air Leaks: Sealing Gaps for Energy Efficiency
Drafts around your sliding door can lead to higher energy bills and uncomfortable temperatures.
- Inspect the Weather Stripping: Check the weather stripping around the door frame for damage or wear. Replace it if necessary.
- Apply Caulk: Use caulk to seal any gaps between the door frame and the wall.
By following these steps, you can effectively perform adjusting sliding doors and resolve most common issues. Regular maintenance will help keep your sliding door functioning smoothly for years to come.
FAQ: Adjusting Sliding Doors
Need a quick recap on common sliding door issues and how to fix them? Here are some frequently asked questions to help.
What are the most common reasons why a sliding door gets stuck?
Common culprits include dirt and debris build-up in the track, misaligned rollers, and warped door frames. Regular cleaning and occasional adjustments can usually prevent these problems from occurring when adjusting sliding doors.
How often should I lubricate my sliding door track and rollers?
Ideally, lubricate your sliding door track and rollers every six months. Use a silicone-based lubricant to minimize friction and ensure smooth operation. When adjusting sliding doors, proper lubrication is essential.
What tools do I need for adjusting sliding doors?
You’ll typically need a screwdriver (Phillips and flathead), a putty knife or scraper for cleaning the track, a silicone-based lubricant, and possibly a level. Having these tools on hand makes adjusting sliding doors much easier.
How do I know if my sliding door rollers need replacing instead of just adjusting?
If your sliding door continues to stick or grind even after cleaning, lubrication, and minor adjustments, the rollers might be worn out. Visible damage or excessive noise are other indicators that it’s time for new rollers. Sometimes, adjusting sliding doors is not enough; replacement becomes necessary.
So, there you have it! Hopefully, you’re now well-equipped to tackle adjusting sliding doors yourself. Give it a shot, and say goodbye to those annoying door issues!